
Have you ever uploaded a Shopify blog image or cover photo, only to see it cropped or cut off when it appears on other pages of your site?
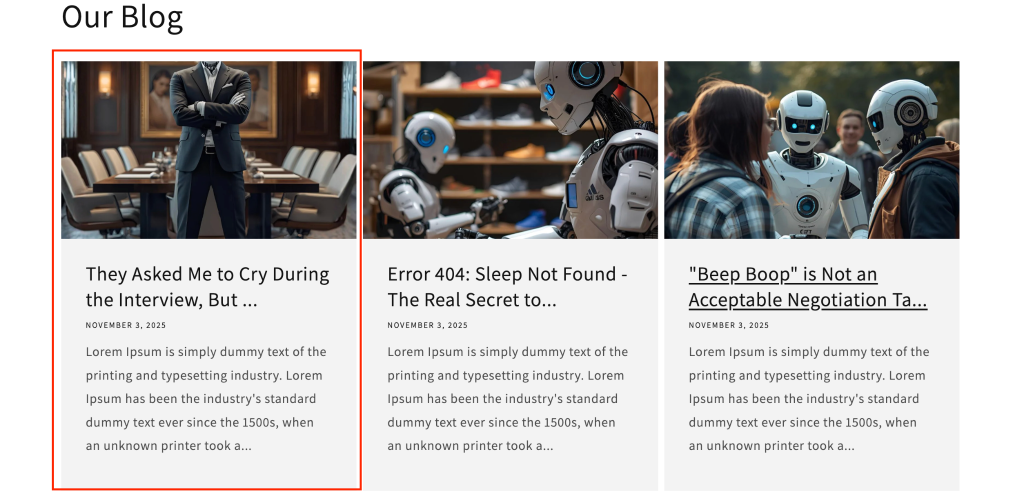
For example, one of my customers recently made a blog post on his store and uploaded a cover photo like this one:
P.S. This image is just an AI-generated imitation of my customer’s 😅

Later, in his featured blog posts section on the home page, he found out that his image was cropped automatically, like this:
In this blog post, I’ll teach you how to avoid this issue and what to do if you need to fix it right now.
So, let’s get to it!
How To Prevent Your Shopify Blog Images From Being Cropped Automatically
First, you have to know that this is happening because the cards that feature your blog posts have CSS code that is automatically focuses on a specific part of the image.
Plus, if your Shopify theme does not have an option to display different sizes of images in this section, there will not be a way to change this, like in the example I mentioned in the intro of this post, we’re using the Dawn theme in this example.
So if you want to prevent this from happening, you need to plan for the dimensions of the images before editing images.
A good suggestion is to standardize the size of blog posts’ cover photos so that they always have horizontal dimensions.
- An aspect ratio 3:2 or 16:9 should keep things safe.
- Something like 1200 x 800px or 1600 x 900px
If you plan ahead for it, you won’t have this problem, and your cover photo will even look better in the blog post page itself.
Now, what if you already have this problem and you just want to fix one image that’s being cropped in your featured blog post section?
Quick Fix: Stop Your Featured Blog Image From Getting Cut Off
Before actually getting to work on your Shopify store, we need to make sure that the code I’ll give you will work for you.
First, make sure you’re using a browser like:
- Chrome (the one I’m using in for this example)
- Or Firefox
Then, go to the page of your site on which you see the featured blog post section, locate it on screen, and then, when you see it, right-click a blank space of the screen and hit inspect:
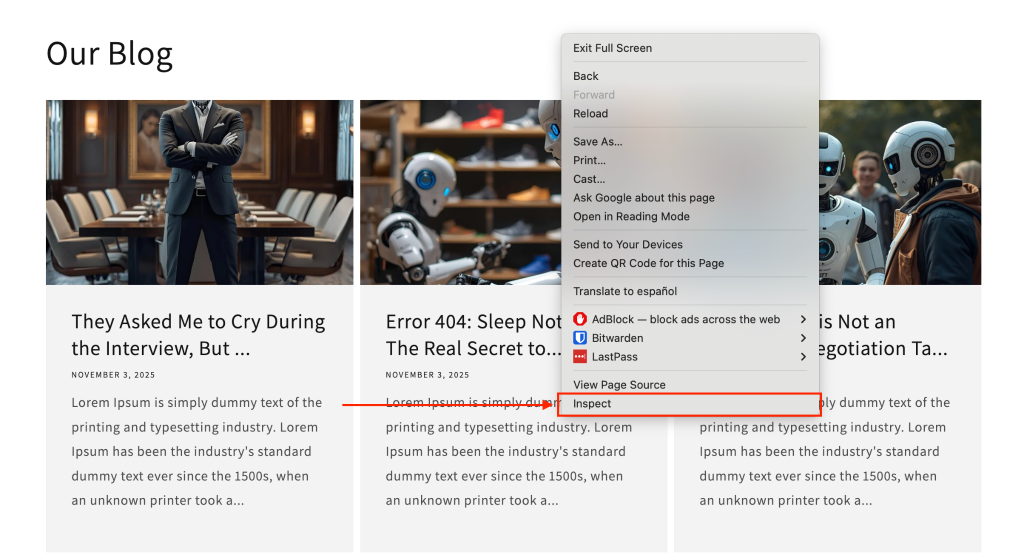
When doing this, Google Dev Tools will prompt on your screen.
Now, click the button to select an element on screen to inspect, and then hover over the image, and click the image that you want to fix.
When you click the image, Dev Tools shows the corresponding HTML element, confirming what you selected visually.
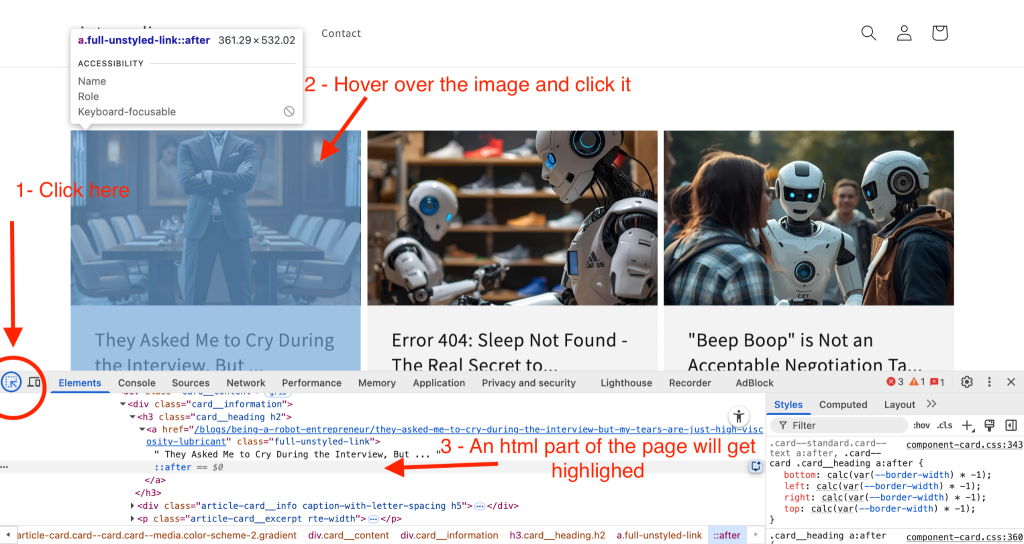
Now, on dev tools, use your up and down arrow keys to navigate through the HTML code and notice that as you navigate, you’ll see different parts of the page highlight as you move in blue.
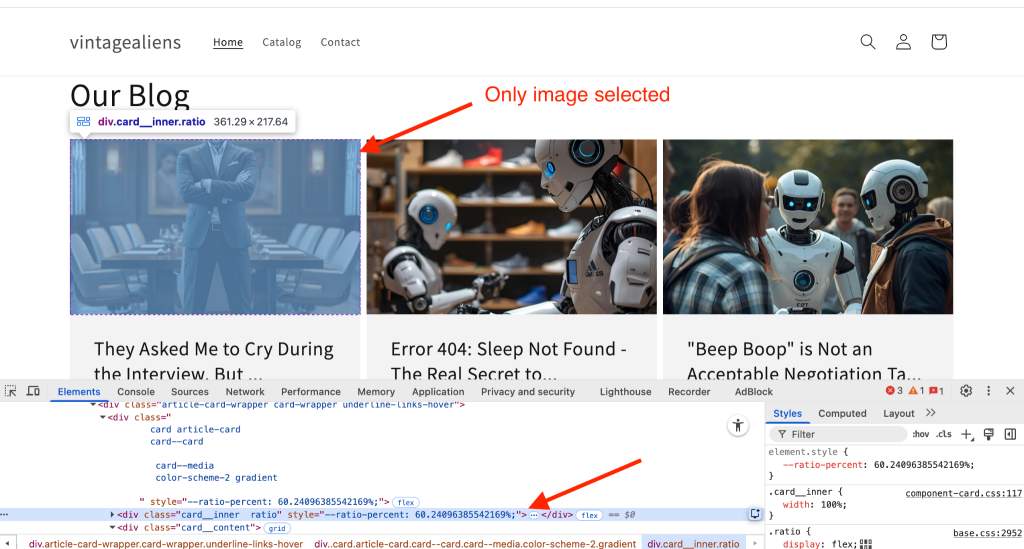
Try to navigate until you’re only selecting the image (nothing else should have this blue square, just the image), like in the example below:
Inspect The Containers Of The Image
Notice that the line of code in my example has an html tag called <div>.
That means that this is just a container, so we have to open that until we find the image which is a tag that looks like: <img>
To open the container in dev tools, notice that the whole line has three dots in between the <div> tags.
You click those dots and you’ll see what’s inside:

When you click that, you’ll probably notice that there will be more <div> tags. Keep opening only the ones that, when you hover over them, the image gets highlighted on screen, and repeat this step until you find an <img> tag, and click it.

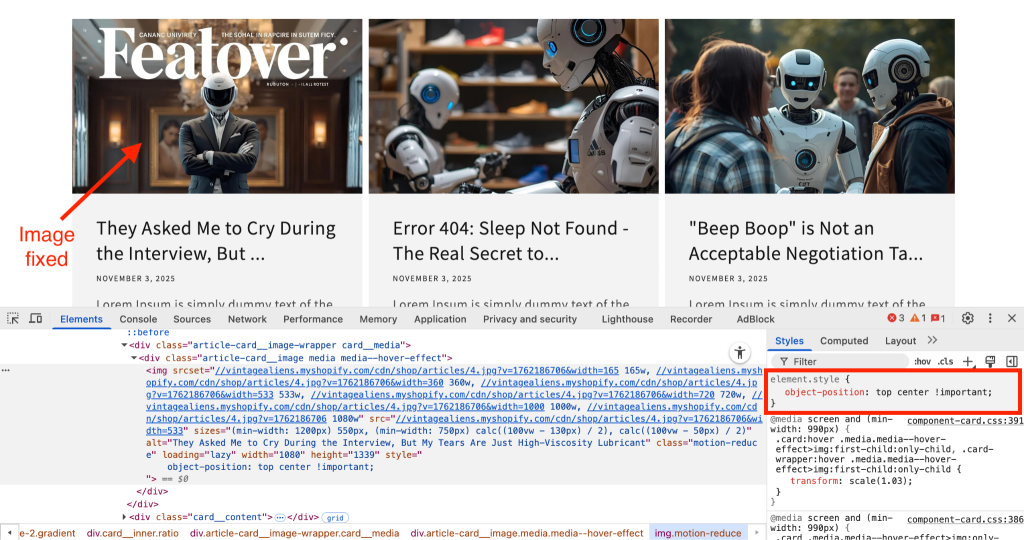
Now, on the right side of the screen, in the dev tools window, notice that as the tab styles is active, there’s a space that says:
Element.style {
}
In between these brackets, I want you to type the following CSS code:
Element.style {
object-position: top center !important;
}
When you insert that line, effects take place immediately so that the top of the image is visible, like in the example below:
This does not mean that you’re image is fixed, we just did all this to make sure that the code will work on your Shopify store.
So if the image got fixed after doing this, go ahead and right click the <img> tag that is selected on dev tools.
Then select copy > copy selector
Apply the Fix in Your Shopify Theme Editor
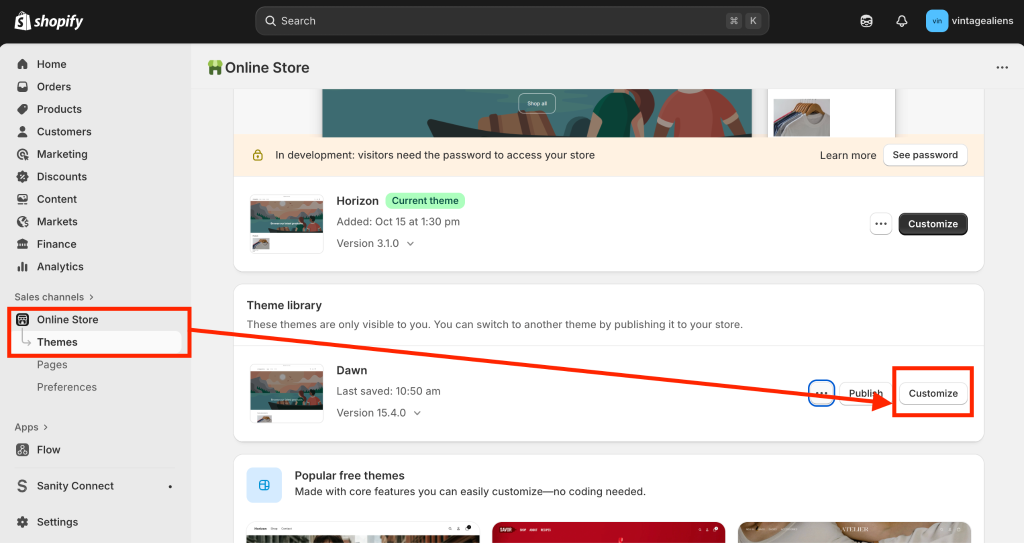
Now that you copied the selector of the image that you want to fix, head over to your Shopify store and go to online store > themes > and hit customize on the theme that you’re using.
In the customizer, go to the page that is holding the featured blog posts section that you want to fix, and locate the section.
In my case, my featured blog post is on the home page, so you’ll see that in the screen-shots.
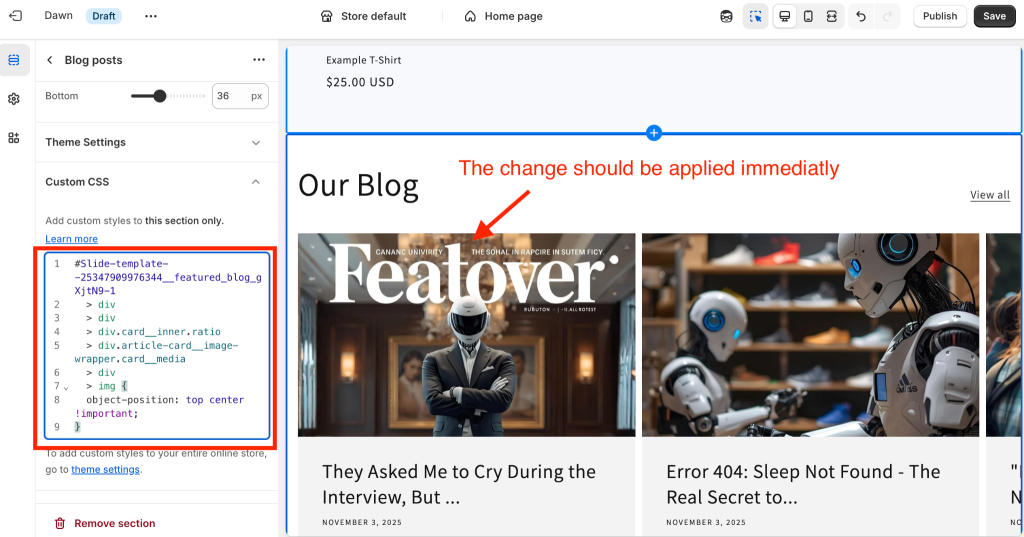
Click the section that contains the feature blog posts and in the panel that contains the options of the section scroll down until you see custom CSS

When you open this, you’ll see a text box meant to type CSS styles.
Right-click there and paste the selector that you just grabbed from dev tools, you’ll end up with a weird css selector, in my case I got this:
#Slide-template--25347909976344__featured_blog_gXjtN9-1 > div > div > div.card__inner.ratio > div.article-card__image-wrapper.card__media > div > imgNotice that the end of this line of code is img, which means that you’re selecting an image, it’s really important that this ends in img, otherwise it won’t do nothing.
Right after img, add:
{
object-position: top center !important;
}
The whole code would be:
#Slide-template--25347909976344__featured_blog_gXjtN9-1 > div > div > div.card__inner.ratio > div.article-card__image-wrapper.card__media > div > img{
object-position: top center !important;
}
This change fixes your image immediately, and the code should look something like in the following screenshot:
Finally, go ahead and hit save on your theme, and you will have fixed your annoying image looking weird.
In Summary
And that’s it!
With just one quick line of CSS, you’ve fixed your cropped image.
No need to re-upload, resize, or touch Photoshop ever again.
If you standardize your blog cover image sizes and use this CSS trick whenever things look off, your featured blog posts will always look clean, balanced, and professional across your Shopify store.
It’s a small detail, but it makes a big difference in how polished your brand feels.
If you found this helpful, stick around for more simple Shopify fixes like this one.