
Switching Shopify themes can feel exciting right up until you realize something is missing.
You open your shiny new theme, head over to the theme editor, and suddenly all those custom product pages, landing pages, collection layouts, or blog templates you spent hours building seem to have vanished.
If you’re wondering how to move a template from one Shopify theme to another, don’t panic.
Store owners do this all the time when upgrading themes, refreshing their store design, or migrating to a completely different Shopify theme.
The good news is that your templates are usually still there.
Shopify simply doesn’t transfer custom templates between themes automatically, which means you’ll need to move them manually.
Fortunately, once you understand how Shopify templates, sections, and theme files work together, the process is much less intimidating than it sounds.
In this guide, I’ll walk through three common scenarios:
- Scenario 1: Moving a template between themes that share the same sections.
- Scenario 2: Moving a template when some sections are missing.
- Scenario 3: Moving a template to a completely different Shopify theme.
Before we start, one important piece of advice:
Always create a duplicate of both themes before touching any code.
We’ll be working with JSON templates, Liquid files, sections, and snippets…
One small mistake usually isn’t the end of the world, but having a backup means you can restore everything in seconds instead of spending the afternoon wondering why your storefront suddenly looks broken.
Ask me how I know. 😅
Now, let’s get your templates moved over safely.
Understanding Shopify Templates to Move a Template From One Shopify Theme to Another
In Shopify’s Online Store 2.0 architecture, templates are stored as JSON files inside the theme. If you’re not familiar with JSON, think of it as a lightweight text file that tells Shopify how to build a page:
“Hey Shopify, first, show a hero section with this image. Then a features section with these icons. Then an FAQ with this text…”
It’s the blueprint, it defines the arrangement and content of a page without actually building the visual elements from scratch.
Templates cover most of the key areas of your store:
- Product templates
- Collection templates
- Page templates
- Blog templates
- Article templates
When you create a template called “custom-product,” Shopify generates a file like this:
templates/product.custom-product.json
That file is the master blueprint:
It controls exactly which sections appear on that page and in what order.
Related: Theme vs Template in Shopify (Explained Simply for Store Owners)
Before You Start (Don’t Skip This)
Before copying any files, spend two minutes on these two things. Skipping them is the fastest way to get into trouble.
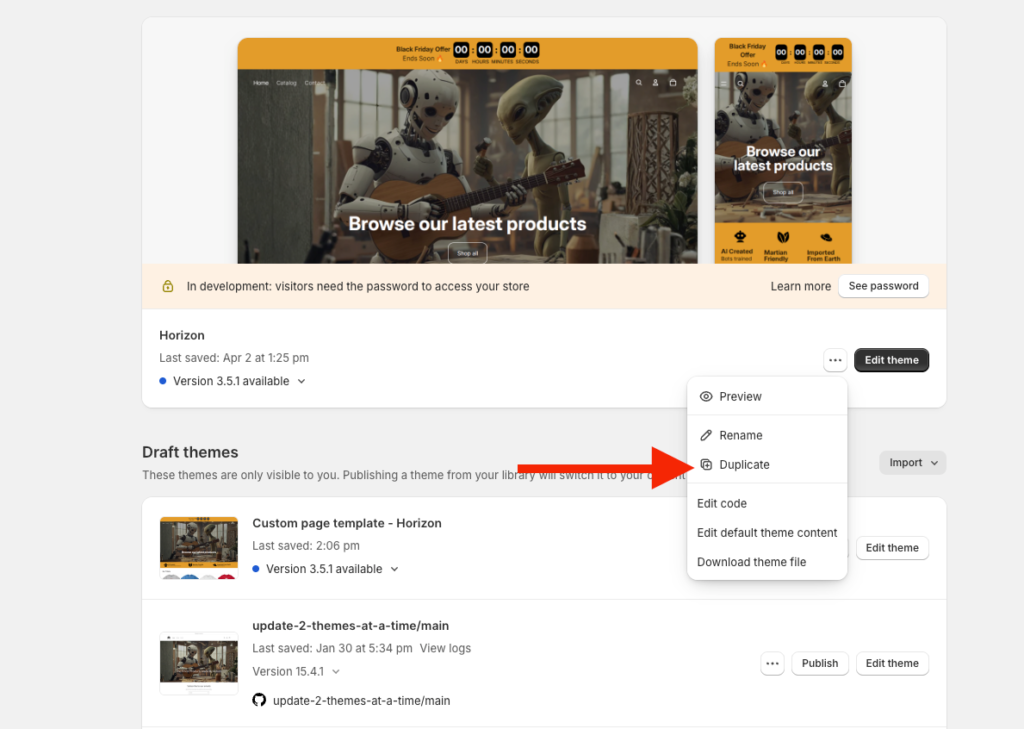
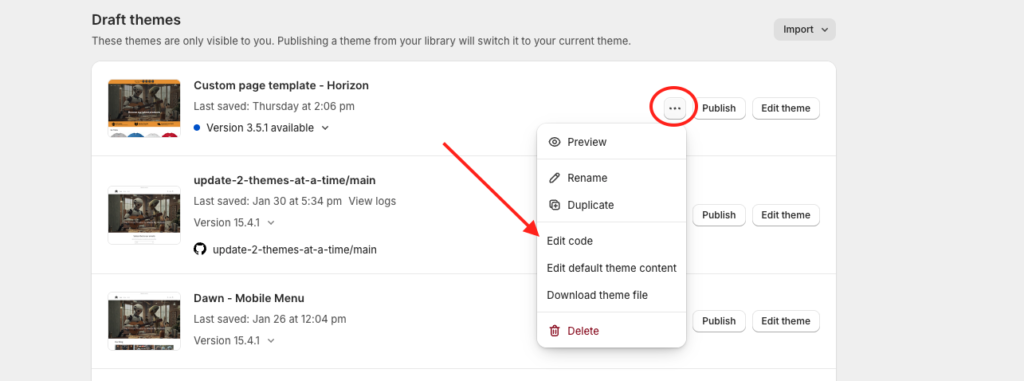
1- Duplicate both themes as backups. Go to your Shopify admin, click the three dots next to each theme, and hit Duplicate. If anything goes sideways, you’ll have a safety net.
2- Confirm both themes are Online Store 2.0 themes. What you’ll read in this post only works if both themes use Shopify’s modern architecture and store templates as JSON files. If your old theme predates OS 2.0, this approach won’t work.
I learned this the hard way early in my developer career.
I thought I had everything under control, hit save, and Shopify threw error after error… you probably know how that goes.
Two minutes of prep would have saved hours of debugging.
Don’t skip it!
Scenario 1: How to Move a Template From One Shopify Theme to Another When Both Themes Share the Same Sections
If you’re moving a template between two themes that share the same underlying sections, for example, from an older version of Dawn to a freshly updated one, you’re in luck.
This is the easiest case.
Think of it like moving furniture between two identical apartments.
Everything fits; you just need to carry it over, and this is the way to do so:
Step 1: Open the Code Editor on Your Old Theme
- Go to Online Store > Themes in your Shopify admin.
- Find the theme with your custom template.
- Click the three dots (…) and select Edit code.
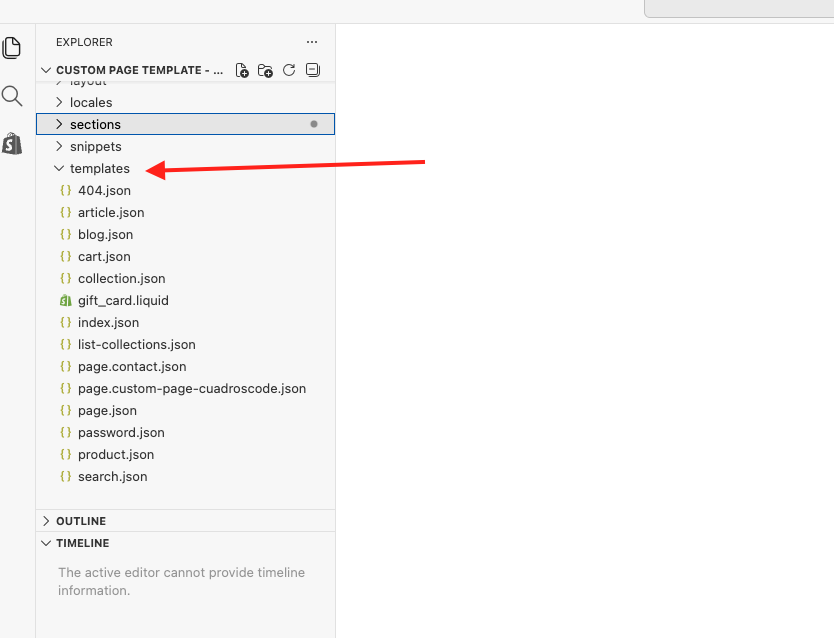
Step 2: Find and Copy the JSON Template
- In the left sidebar, scroll to the Templates folder.
- Find your custom template, it’ll be named after what you called it when you created it. A custom product page named “custom-product” will appear as product.custom-product.json.
- Click the file to open it.
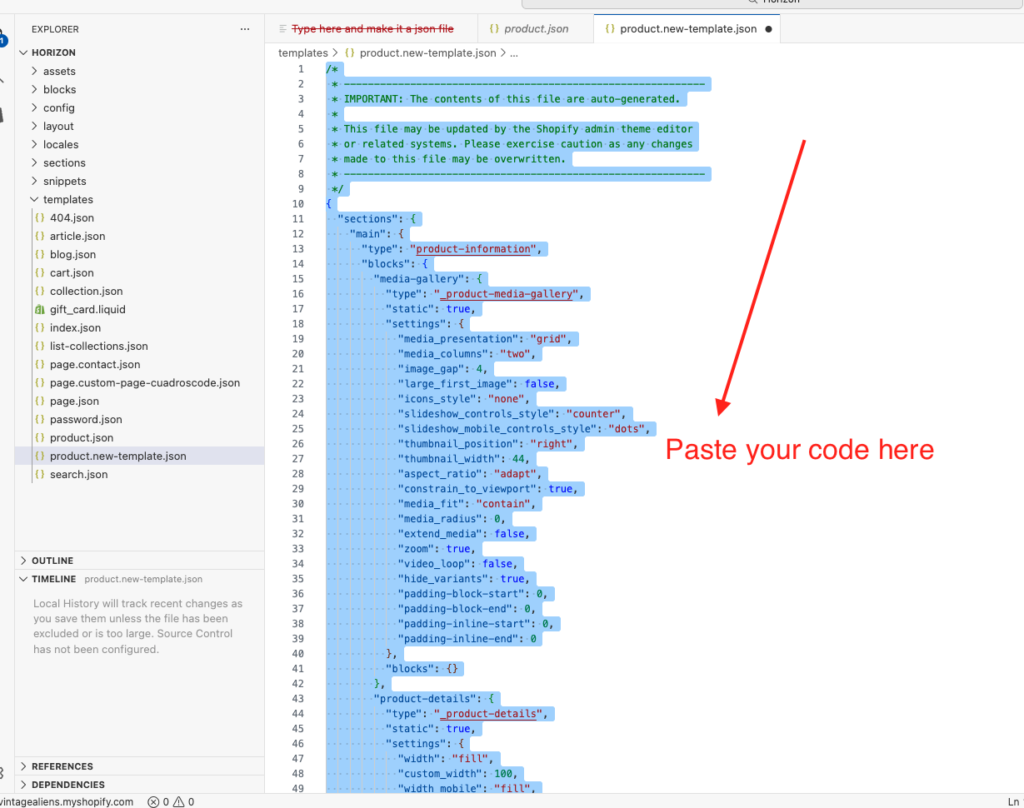
- Select everything (Ctrl+A on Windows, Cmd+A on Mac) and copy it. Don’t change a single character, just copy the whole block exactly as it is.
Step 3: Create the New Template in Your Destination Theme
- Go back to Themes and find your new theme.
- Click the three dots (…) and select Edit code.
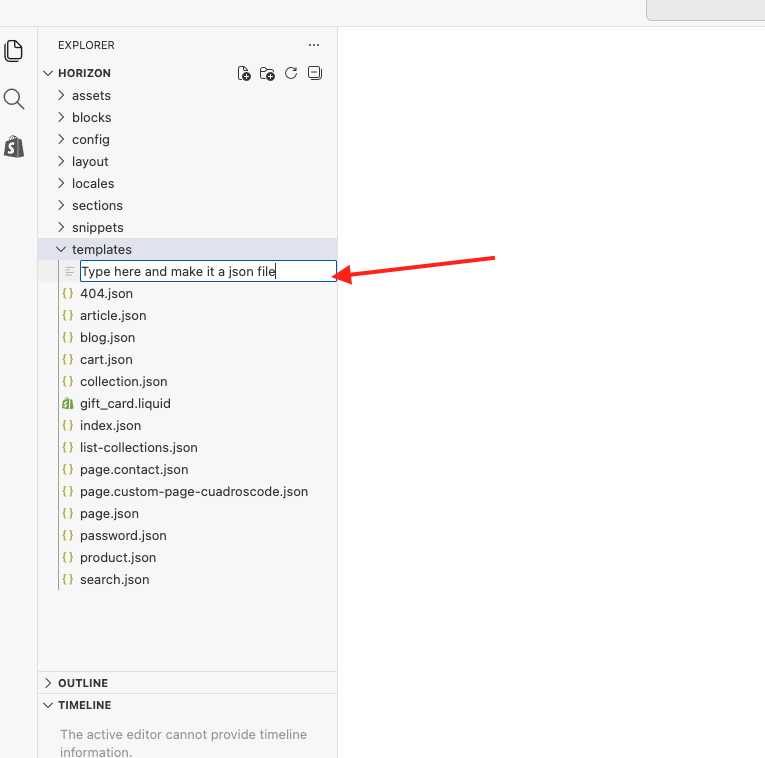
- Under the Templates folder, click Add a new template by clicking the new file icon.
- Then, right inside the templates folder a white box shows up in which you may type the name of the file, which should be the same name of the template it had in the old theme.
- Click outside the name of the file or simply hit enter.
Quick Note: Naming Your Template Correctly
When creating the new template, make sure you use the same template type and name as the original file.
Shopify templates follow a simple naming structure:
- Product templates:
product.template-name.json - Collection templates:
collection.template-name.json - Page templates:
page.template-name.json - Blog templates:
blog.template-name.json - Article templates:
article.template-name.json
Notice the pattern?
If it’s a product template, the filename starts with product, followed by a dot (.), then your template name, and finally .json.
If it’s a collection template, it starts with collection instead. The same logic applies to pages, blogs, and articles.
For example:
product.custom-product.jsoncollection.summer-sale.jsonpage.landing-page.json
The easiest approach is to simply match the original filename exactly.
If your old template is named product.custom-product.json, create a new product template called custom-product in the destination theme.
This ensures Shopify recognizes it as the same template and makes it available to any products, collections, pages, or blog posts that were using it.
Step 4: Paste and Save
- Select all the default code Shopify generated and delete it entirely.
- Paste the code you copied from your old theme.
- Hit Save.
That’s it. Open the theme customizer on your new theme, and your layout should be sitting there, perfectly intact.
Scenario 2: Move a Template From One Shopify Theme to Another When Sections Are Missing
Now imagine you’re moving to a newer version of the same theme, but the custom sections you built don’t exist in the new theme files yet.
Start with the same steps as above, copy the JSON, create the new template file, paste, and save.
If the sections referenced in your template don’t exist yet, Shopify will throw an error.
A warning will pop up in the bottom-right of the screen telling you exactly which section is missing. Think of it as a shopping list.
For example, if the error says the missing section is called “hero-section,” the actual file you need is:
hero-section.liquid
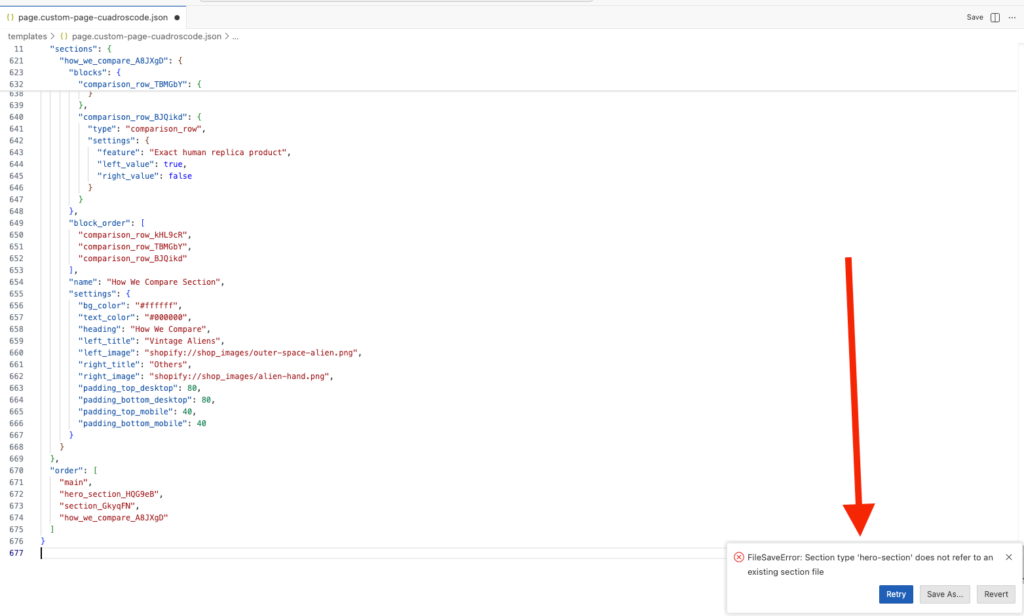
(All Shopify sections are .liquid files; the error message won’t say that explicitly, but now you know.)
Here’s how to bring it over:
- Go to the Sections folder of your old theme and find hero-section.liquid.
- Open it, select everything, and copy all the code.
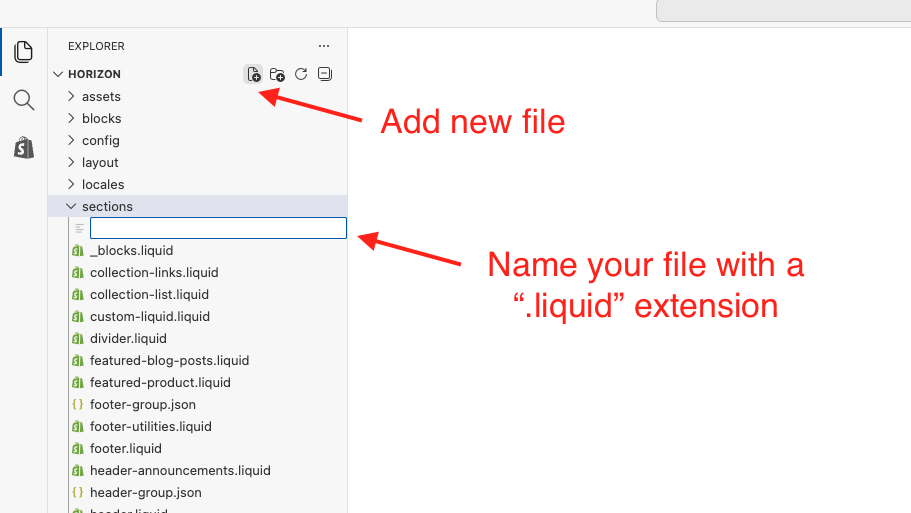
- In your new theme’s code editor, go to the Sections folder and click Add New File.
- Name it exactly the same as in the old theme, including the file extension (you know “.liquid”).
- Delete any default code, and then paste your section code. Finally hit Save.
Repeat this for every missing section, the error flags.
Don’t Forget: CSS, JavaScript, and LIQUID Snippets
This is where most people think they broke the store.
The section saves fine, but the preview looks like a broken 1990s website. You know, buttons won’t work, styling are missing… something’s off.
The reason is that custom sections often rely on separate CSS and JavaScript files, plus smaller reusable liquid files called snippets.
Think of snippets as small chunks of code that do something specific in your section.
A good comparison would be thinking of a section as a room in a house, and a snippet as a TV you hang on the wall.
You know, you can move it around the house, and use it somewhere else, but right now you’re using it in this specific room.
So what you’re doing now is moving your TV to a room in a new apartment.
In other words, you need to bring all of those liquid snippets over to your new theme so that the template behaves just like it used to in your old theme a.k.a. apartment 😆.
Let’s begin first with your CSS.
Finding CSS files
Open your section file in the old theme and press Cmd+F (Mac) or Ctrl+F (Windows).
Search for “.css”.
If any external stylesheet is referenced, you’ll see it highlighted.
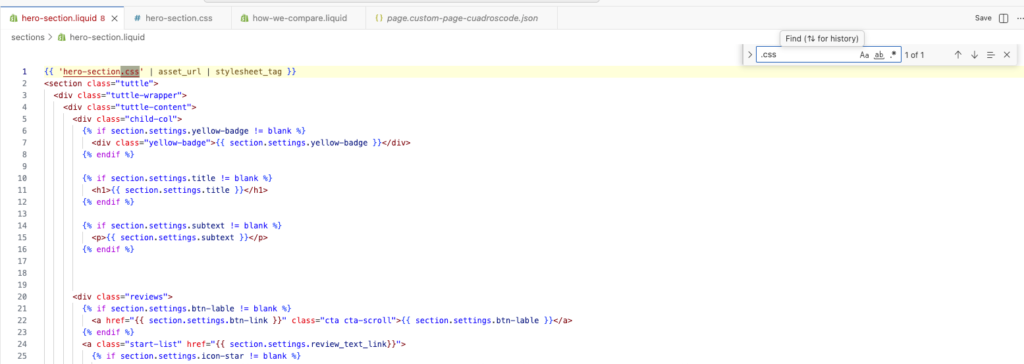
Go to the Assets folder, find that file, copy the code, then create a new file with the same name in your new theme’s Assets folder and paste it in.
Finding JavaScript files
Same process, but search for “.js” in the section file of the old theme. Find the highlighted reference, grab the file from the assets folder, and recreate it in the new theme.
You know, same game…
Go to the code editor of the new theme, browse to the assets folder, click “New File”, name it the same as it is called in the old theme (including file extension), paste the code and hit save.
Finding snippets
Now, go back to your old theme again and look for external liquid snippets.
As I explained previously, Shopify code is often split into smaller reusable files called snippets.
These snippets are usually loaded somewhere inside your section file, and if you don’t bring them over, your section may partially work, show errors, or fail completely.
To find them, open your section file in the old theme and use cmd + f on Mac or ctrl + f on Windows.
Search for:
{% render %}
or
{% include %}
These are the two most common ways snippets get called inside Shopify themes.
You’ll usually see something like:
{% render ‘hero-button’ %}
or
{% render ‘hero-icons’ %}
The name inside the quotation marks is the snippet file you need.
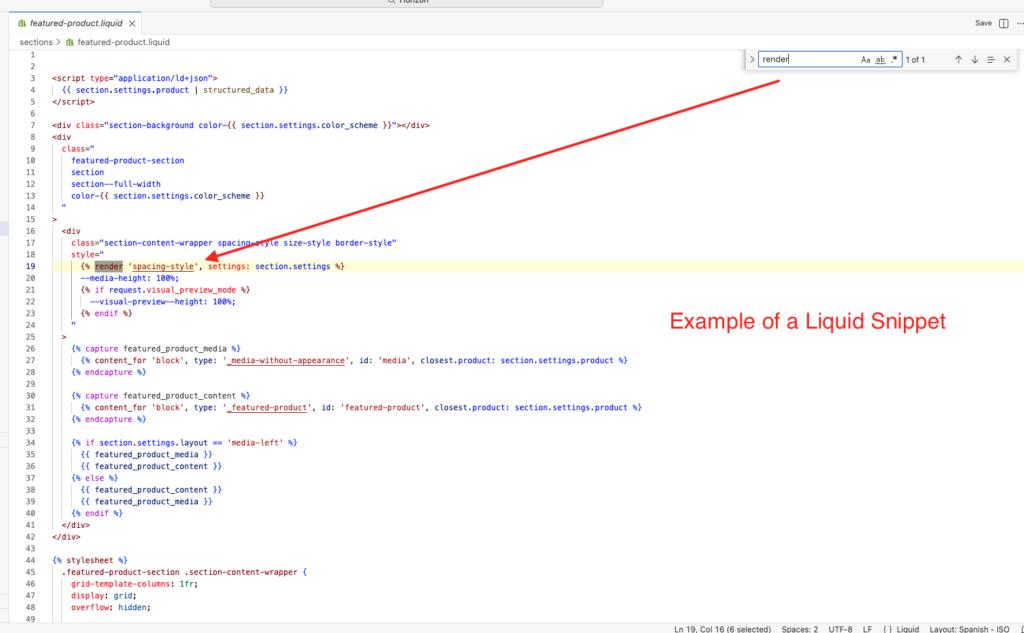
So, once you find a result, head over to the Snippets folder of your old theme and look for those files.
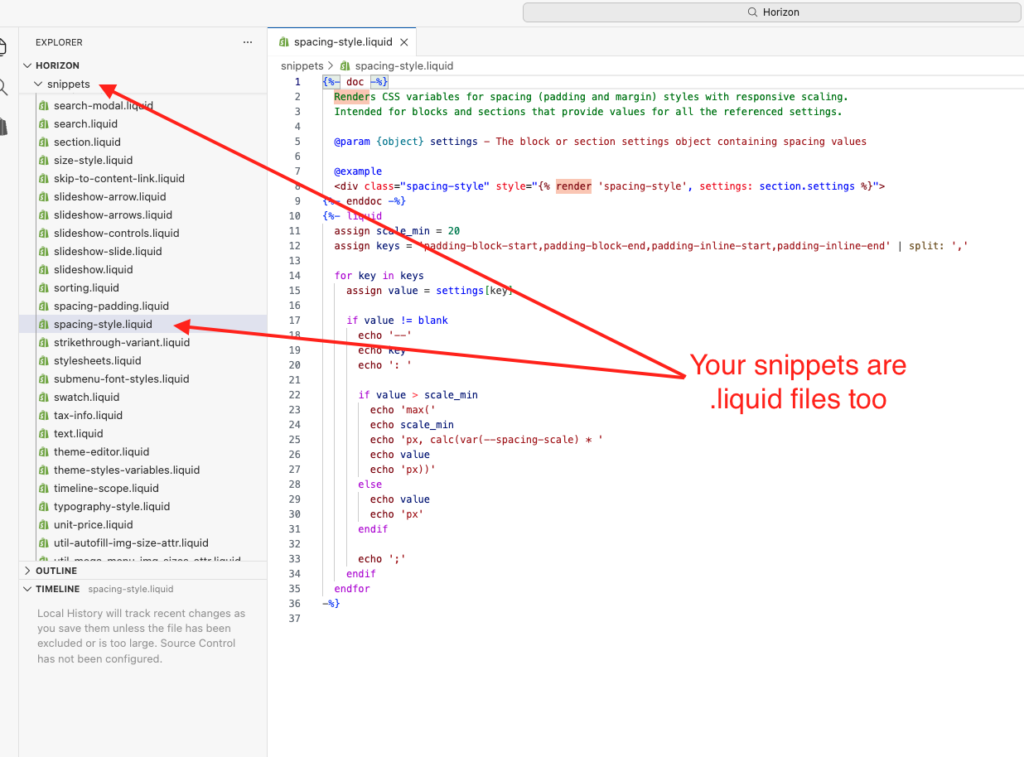
Open each one, copy all the code, then go to the Snippets folder of your new theme.
Click the new file icon to create a new file in your code editor.
Name it exactly the same as the original file along with the .liquid extension, you know, “hero-icons.liquid” for example, and paste the code inside.
Repeat this process for every snippet your section uses.
With all these steps your section should be ready to rock and roll on the new theme, however…
What If The Section Still Doesn’t Work?
If you’ve copied the section file, all CSS files, all JavaScript files, and all snippets, but the section still isn’t behaving correctly, there are usually only a few possibilities:
- The section depends on an app that isn’t installed in the new theme.
- It uses a global file that exists elsewhere in the old theme.
- The section references theme settings that don’t exist in the new theme.
- It might contain code that was customized specifically for the old theme structure.
In these cases, you’ll need to inspect the code a little more closely to identify what else the section depends on.
Fortunately, most custom sections only rely on a handful of files, and once you understand the process above, moving them becomes a relatively straightforward task.
Scenario 3: How To Move a Template From One Shopify Theme to Another When Using Different Themes
Everything we’ve covered so far assumes you’re moving a template between copies of the same theme, or at least between very similar versions of a theme.
But what happens when you want to move a template from one Shopify theme to a completely different one?
For example:
- Dawn → Impulse
- Impulse → Prestige
- Prestige → Shrine
- Or any other combination of unrelated themes
Technically, you can still move the template.
The process is exactly the same:
Copy the JSON template.
Create a new template file in the destination theme.
Paste the JSON code.
Move any missing sections, CSS files, JavaScript files, and snippets.
However, there is one very important thing you need to understand:
Just because a template can be moved doesn’t mean it should be moved.
Related: Free vs Paid Shopify Themes: Which Should You Choose?
Different Themes Are Built Differently
Every Shopify theme has its own architecture.
- CSS framework.
- JavaScript functionality.
- Settings.
- Its own coding conventions.
A section built specifically for Theme A may rely heavily on files, classes, settings, and functionality that simply don’t exist in Theme B.
Think of it like taking a car engine out of a Honda and trying to install it into a BMW.
Some parts may fit.
Other parts may work after a few adjustments.
Some parts may require extensive modifications before they function properly.
The same thing happens with Shopify themes.
I’ve even worked in themes in which the most optimal thing is to migrate the sections through code like I explained previously, then create the template from the customizer and build the sections visually from there.
When It Usually Works Well
Moving templates between completely different themes tends to work best when:
- The template mostly uses custom sections you built yourself.
- The sections have their own CSS and JavaScript files.
- The sections don’t rely heavily on theme-specific functionality.
- The original theme wasn’t heavily modified.
In these situations, you can often move the template and supporting files with minimal issues.
When Problems Usually Start
Things become more complicated when your sections depend on the original theme’s codebase.
For example, a section might:
- Use CSS classes from the old theme.
- Depend on JavaScript functions loaded globally by the old theme.
- Pull settings from the old theme’s configuration.
- Interact with other theme components such as sliders, drawers, popups, accordions, tabs, or product galleries.
When that happens, simply copying the files isn’t enough.
You’ll need to identify those dependencies and either recreate them or rewrite parts of the section maybe using AI or an actual professional Dev! 🤓
Related: Do You Really Need a Custom Shopify Theme in 2026? (Probably Not)
My Recommendation
If you’re moving a single landing page, sales page, homepage section, or custom content section, it’s usually worth attempting the migration.
The process is often surprisingly straightforward, and you should be able to achieve this with the steps I explained in this post.
However, if you’re trying to move dozens of sections from one theme to a completely different theme, you’ll often spend more time fixing compatibility issues than rebuilding the sections properly for the new theme.
In those situations, it’s usually better to treat the new theme as a fresh foundation and rebuild only the pieces you actually need.
Just keep this in mind…
- The more self-contained a section is, the easier it is to move.
- The more it depends on the original theme’s code, the harder the migration becomes.
In other words, the easiest sections to migrate are the ones that hold all code, CSS, JS, and all liquid in the section file (no external code).
So before you start moving files around, take a few minutes to inspect the section and understand what it depends on.
That simple step can save you hours of debugging later.
Oh, and I almost forgot about Metafields… 🤦🏻♂️
If your template relies on metafields, ensure those metafields still exist and contain data.
However, since you’re trying to show the same info, you shouldn’t have a problem with this unless your fields are too deeply dependable on your theme.
Rembember that templates can reference metafields such as:
- Product specifications
- Custom icons
- Size guides
- FAQs
Without them, parts of the page may appear empty.
Final Thoughts
Moving a template from one Shopify theme to another is usually much easier than people expect.
The template itself is often just a JSON file. The real challenge is identifying and moving everything that template depends on, such as sections, snippets, CSS files, JavaScript files, and occasionally metafields.
If something breaks during the process, don’t assume you’ve done something wrong.
More often than not, Shopify is simply telling you that a file or dependency is missing.
Take it one step at a time:
- Move the template.
- Move any missing sections.
- Copy over CSS and JavaScript files.
- Check for snippets and other dependencies.
- Test everything before publishing.
Whether you’re upgrading to a newer version of your current theme or trying to move a template from one Shopify theme to another entirely, understanding how Shopify templates are connected behind the scenes gives you much more control over your store.
And once you’ve done it a couple of times, you’ll realize it’s less of a technical mystery and more of a checklist.
Hopefully, this guide saved you a few hours of trial and error, and maybe prevented a few moments of panic along the way.
Now, over to you… are you struggle to migrate a shopify template to a new theme?
Hit reply and let me know what you’re struggling with, I might be able to give you a hand.