
If you want to quickly add urgency to your store with a clean, customizable Shopify countdown timer bar, the Horizon theme makes it easier than ever.
You can build it without coding and without installing apps, thanks to the new AI Block Generator.
In this guide, I’ll show you exactly how to recreate the countdown timer I built in my latest YouTube tutorial. It works beautifully on desktop and mobile, and it’s 100% customizable.
Let’s get started.
Why Use the Horizon Theme’s AI Generator?
With the Horizon theme, Shopify introduced a powerful AI block generator that can create layout sections, timers, containers, and even complex components.
All you need to do is write a prompt, like asking a friend to do it for you!
Or at least a very smart friend…
In other words, you’ll be able to build sections that didn’t exist before, tweak layouts that normally would require coding, and create reusable blocks for any project.
But let’s stop talking so much and jump right into action!
First of all, go to your Shopify admin and open the Horizon theme:
- Online Store > Themes
- Click Customize
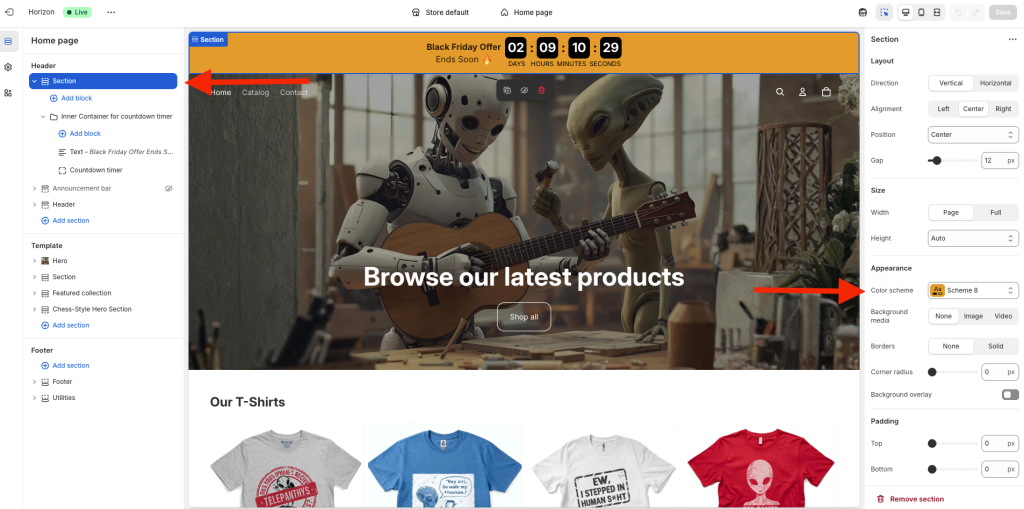
Once inside, we’ll add a countdown bar to the top area of the website, right below the header.
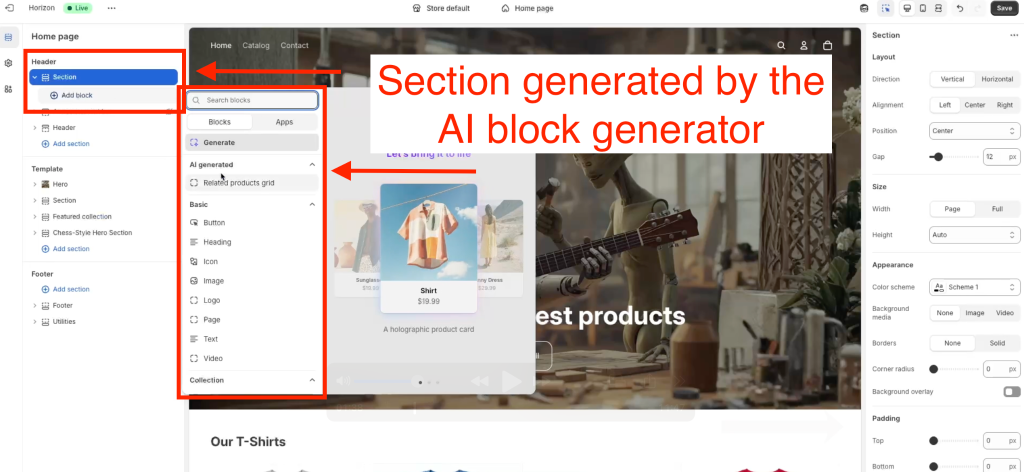
Step 1: Add a Section to the Header Using AI
Before we start building the Shopify countdown timer bar, we need to add a section to the header using the Horizon theme’s AI generator.
At first glance, you’ll notice the header doesn’t normally support inserting blocks. That’s where the AI comes in.
Inside the editor:
- Click Add Section
- Select “Generate” to use the AI block generator
- Type a prompt like this: “Give me a section that allows adding blocks.”
The theme will generate a new section with block support.
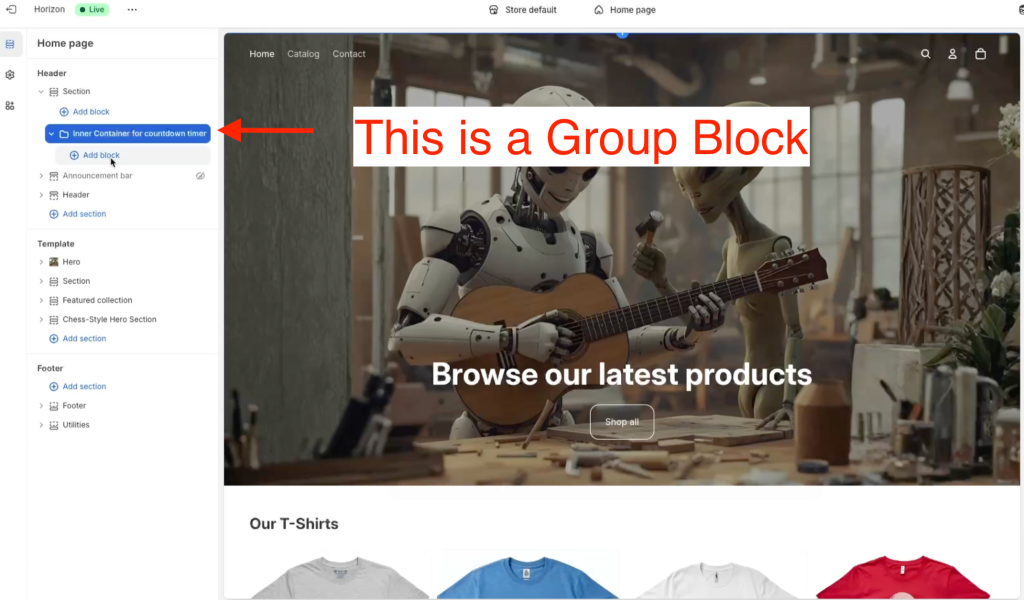
Step 2: Add a Group Block (Your Timer Container)
Inside your new section:
- Add a Group block
- Rename it to something like Countdown Container to stay organized
This group will hold the timer and the text label.
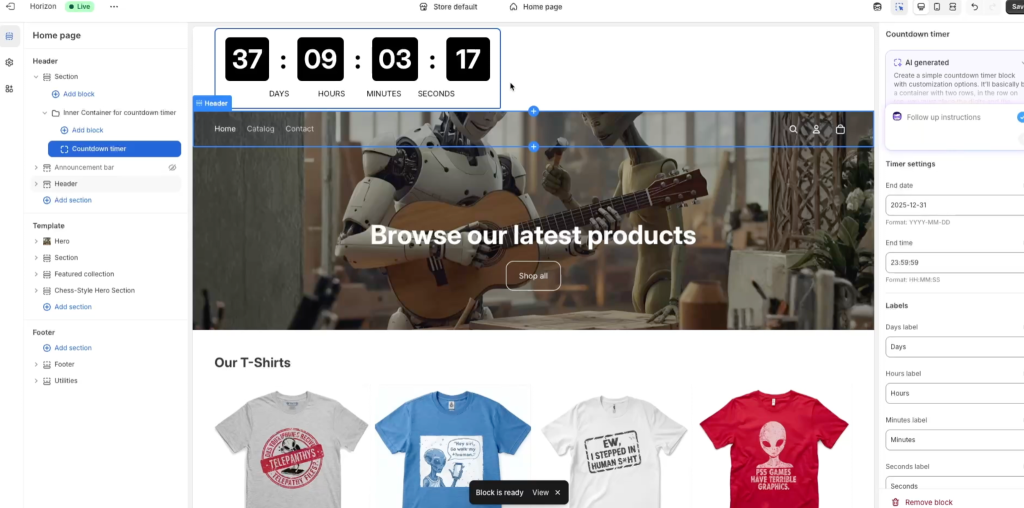
Step 4: Generate the Countdown Timer Block Using AI
There’s no default timer element, so we’ll ask the AI to create one using a prompt like the following:
“Create a countdown timer with adjustable spacing between digits, customizable labels, and responsive controls for desktop and mobile.”
Try copying and pasting the same prompt I’m using and see if you can get a similar result to the one the AI generated for me; otherwise, try being a little more specific in what you want for your timer.
AI will generate the entire timer block for you.
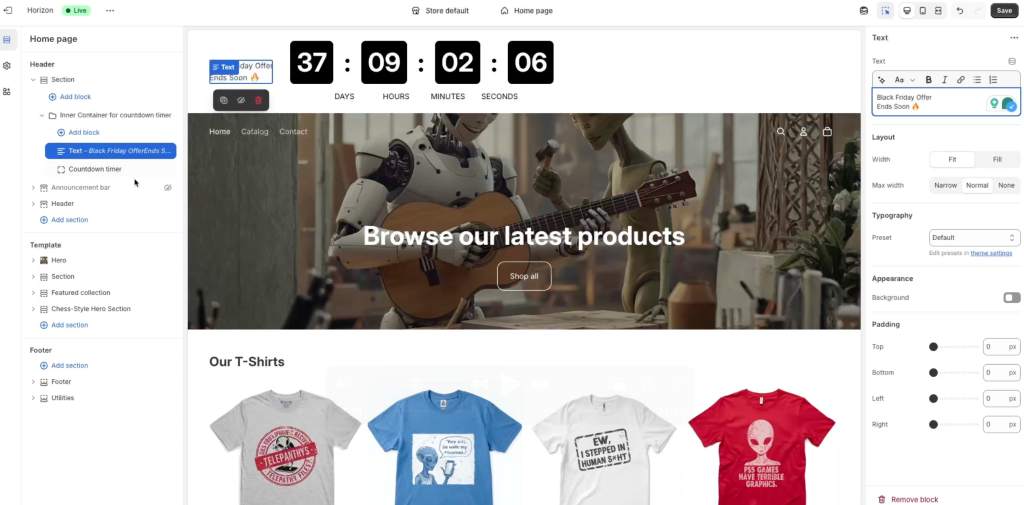
Step 5: Add Your Text Label
Now add a simple text block inside the group, and make sure you select the option “Horizontal” on the direction options for the group holding both the text and the timer.
Then, on the text block, go to the options and write down a label for your timer, something like: “Black Friday Ends Soon” might be useful for the Black Friday season.
Tip: When you type the text, if you hit enter, you’ll get a double line jump, so if you want just one use shift + enter.
Related: How to Add Custom Trust Badges in the Shopify Horizon Theme (No Code Required!)
Step 6: Adjust the Timer Settings
The AI-generated timer will give you options to display your timer differently.
Now, depending on your prompt, you may get different options than the ones I got in this tutorial, so just have that in mind and don’t get too frustrated if you don’t get the same options as I do.
As I said before, you might try to run another prompt for the AI block generator and see if you can be a little more specific on what you want it to generate.
In my case, I got options like the following options, just in case you want to use them in your prompt:
Timer settings
- End date
- End time
Labels
- Days label
- Hours label
- Minutes label
- Seconds label
- Label text case (uppercase, lowercase, etc)
Layout
- Unit gap (desktop)
- Unit gap (mobile)
- Unit width (desktop)
- Unit width (mobile)
- Gap between digits and labels
- Separator spacing
Digits style
- Font size (desktop)
- Font size (mobile)
- Digit height (desktop)
- Digit height (mobile)
- Font weight
- Digit padding
- Digit border radius
- Digit background
- Digit color
- Separator color
Label style
- Font size (desktop)
- Font size (mobile)
- Label color
Container style
- Background color
- Container padding
- Container border radius
These timer settings make it easy to fine-tune the look of your Shopify countdown timer bar, especially if you want something bold for seasonal sales.
Step 7: Create a Custom Color Scheme
The whole bar right now has a white background color, and even though you were generating the complete countdown timer with the AI block generator, you wouldn’t be able to fill up the entire section with the options created by the AI.
To take care of this, you’re going to need a color scheme, which you may do following these steps:
- Go to Theme Settings > Colors > Schemes
- Create a new custom scheme
- Set your desired background color
Then, just head over to the main section (the one containing the group that holds the text and the timer), and in the appearance option, select your new color scheme.
Step 8: Adjust Layout + Spacing (Desktop & Mobile)
To make the bar clean and balanced so that it looks good on mobile and desktop, I had to go ahead and adjust some of the settings that my AI prompt generated.
Here’s what I adjusted so you can have a reference of the settings you’d need to modify to achieve something similar:
Desktop:
- Set separator spacing to 0
- Set unit gap to around 6–8px
Mobile:
- Turn off vertical layout
- Reduce inner padding
- Adjust digit spacing (8px looks great)
- Adjust unit gap for labels and numbers
These tweaks ensure the timer looks perfect across devices.
After adjusting spacing, typography, colors, and the date settings, give everything a final review in both views.
Your fully responsive, AI-built countdown timer bar is ready!
Should You Let AI Build the Entire Bar at Once?
Someone could say that instead of asking the AI to generate a section first, then insert a group into this section, and then make a text inside this last block along with the AI generated countdown timer is useless because the AI could’ve generated all tha for you.
And technically, yes—you can prompt the AI to generate the entire completed bar.
But in practice, you would need a prompt with more details, plus, the more elements you want in your AI generated block, the less control you have over the results.
Because of that I rather going in a little more detail, inserting containers (like sections and groups) manually, and then asking the AI to do more specific elements (like just the timer with no label).
This gives you the cleanest and most customizable result, or at least it does in my opinion.
Final Thoughts
Using the Horizon AI generator is one of the simplest ways to build a fully responsive Shopify countdown timer bar without touching code.
With just a prompt, you can create components that normally require coding or expensive apps.
If you found this tutorial helpful, please subscribe to my YouTube channel here so that I can keep bringing more tutorials like this.