If you’re running your store on the Shopify Horizon theme, you’re going to love this tutorial.
Trust badges are one of the easiest ways to build credibility, highlight key product features, and instantly boost conversions — without using any apps or touching a single line of code.
In this step-by-step guide, I’ll show you exactly how to build a clean trust badge section using nothing but the Shopify Customizer.
Let’s get started!
Why Trust Badges Matter
Trust badges quickly communicate important product details, such as:
- Guarantees
- Materials
- Shipping policies
- Quality indicators
- Warranties
These small visual indicators build confidence and help customers make decisions faster.
The best part?
The Horizon theme makes building them incredibly easy.
To get started, just go with the usual, head over to your Shopify admin and go to:
Online Store → Themes → Customize
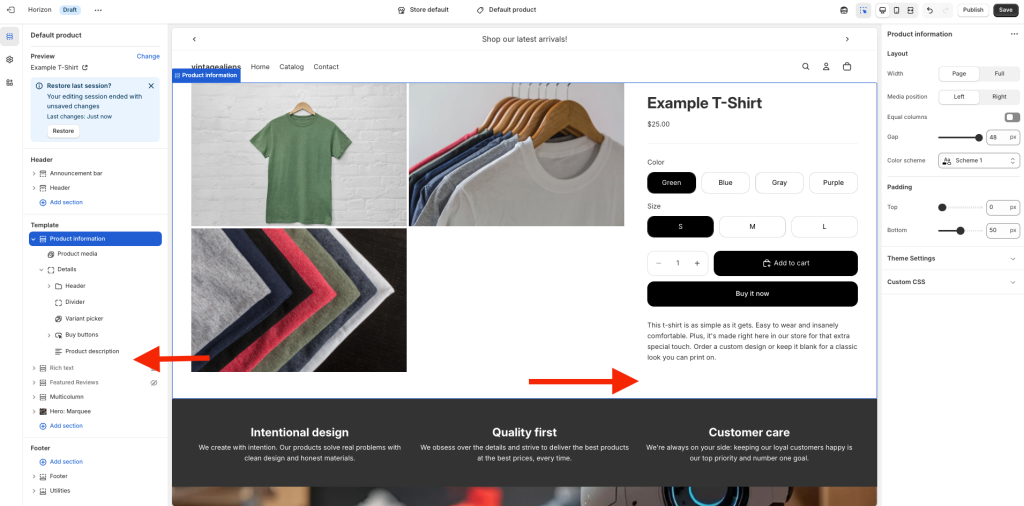
Once inside the Customizer, navigate to the Product Template you want to edit.
(In my example, I’ll be doing this over the Default product template.)
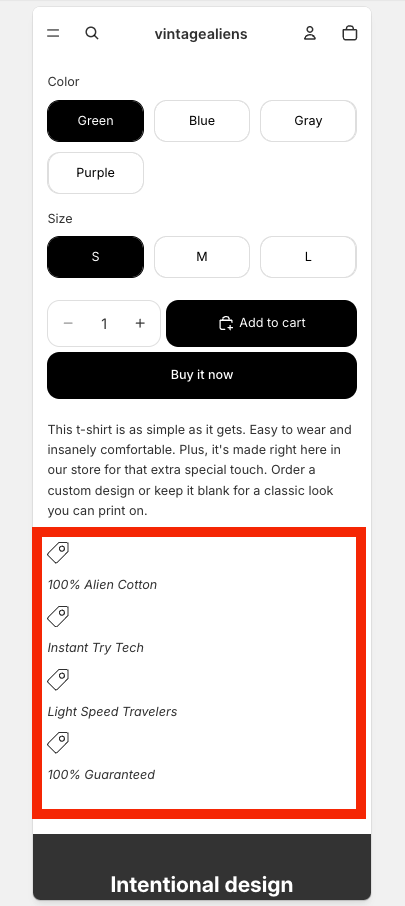
Most stores place their badges right below the product description, so they appear close to the Buy Button.
This is where we’ll add them:
Working With Groups in The Horizon Theme
Before we start building the trust badges, it’s important to understand what Groups are in the Horizon theme.
In simple terms, a Group is just a flexible container that lets you organize blocks inside the Shopify Customizer.
Think of it like a folder: it doesn’t display anything by itself, but it holds and arranges the elements inside it, such as icons, text, or other groups.
Horizon uses Groups to give you much more control over layout, alignment, spacing, and responsive behavior (especially on mobile).
This makes it possible to build more complex sections, like multi-row trust badges, without writing a single line of code.
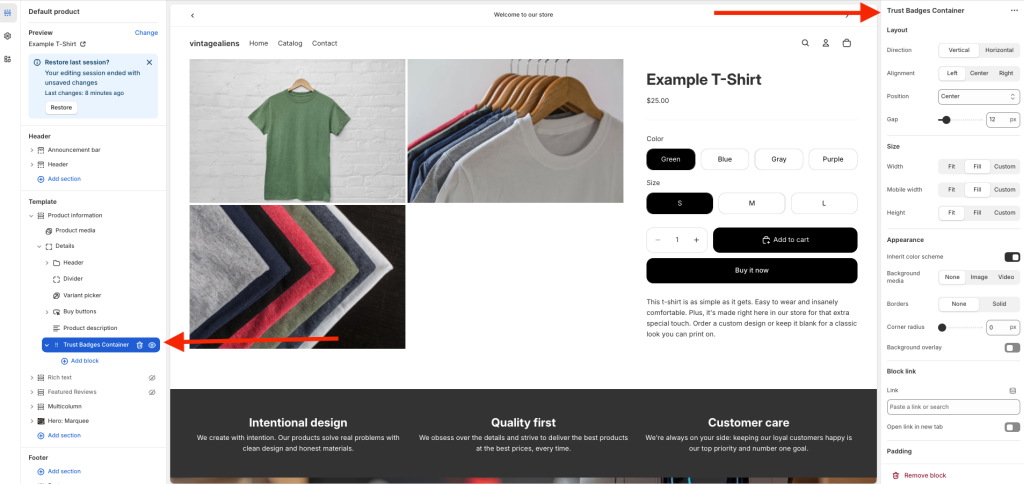
So, having all this clear, let’s create a group, so inside the product information section (so that you may display these badges in your product info):
- Click Add block
- Choose Layout > Group (this acts like a container)
- Rename it to something clear like “Trust Badges Container”
Renaming will help you stay organized, especially since you’ll be working with multiple groups.
Oh, and btw… to rename a group, simply right-click the group in the panel where you see the structure of your page (left bar on my screenshot) and click rename.
Then go to the options and notice that the name of the element is turned into a text box in which you can type, give that a name, and hit enter.
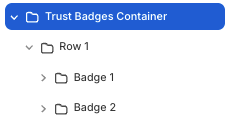
The Structure of the Badges Container
Now that you have created the main container (or group), we’ll insert two more groups that will be rows 1 and 2.
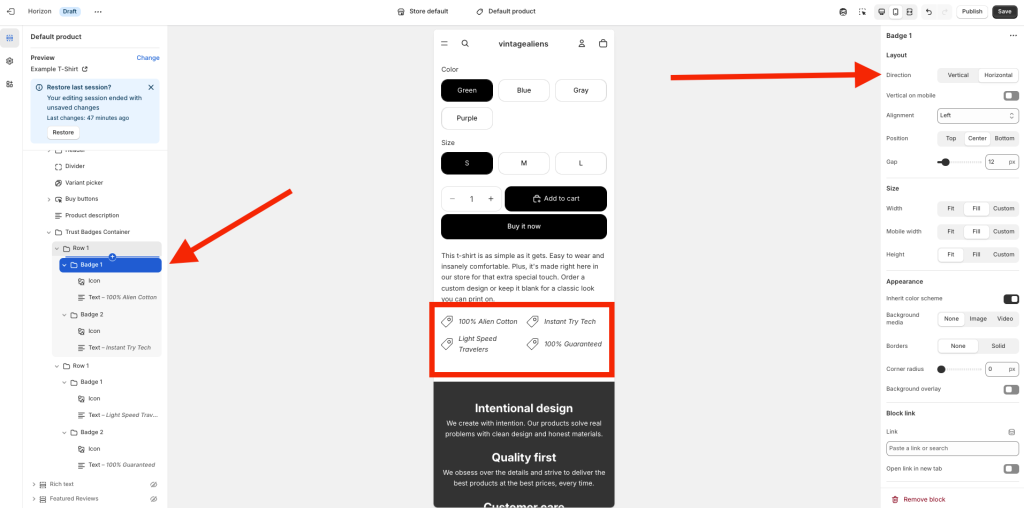
Basically, what you have to do is create two more groups inside the main group element, and just so that you get an idea of the structure, notice the following image:
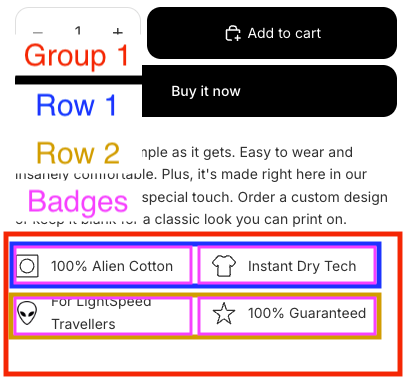
So, inside your main container:
- Add a new Group
- Rename it to Row 1
Now inside Row 1, add two more groups — one for each badge:
- Badge 1
- Badge 2
Inside each badge:
- Click Add block
- Add an Icon
- Add Text
By default, Shopify stacks elements vertically. To place the icon next to the text:
- Select the Badge group
- Change the Layout Direction from vertical → horizontal
Repeat for every badge.
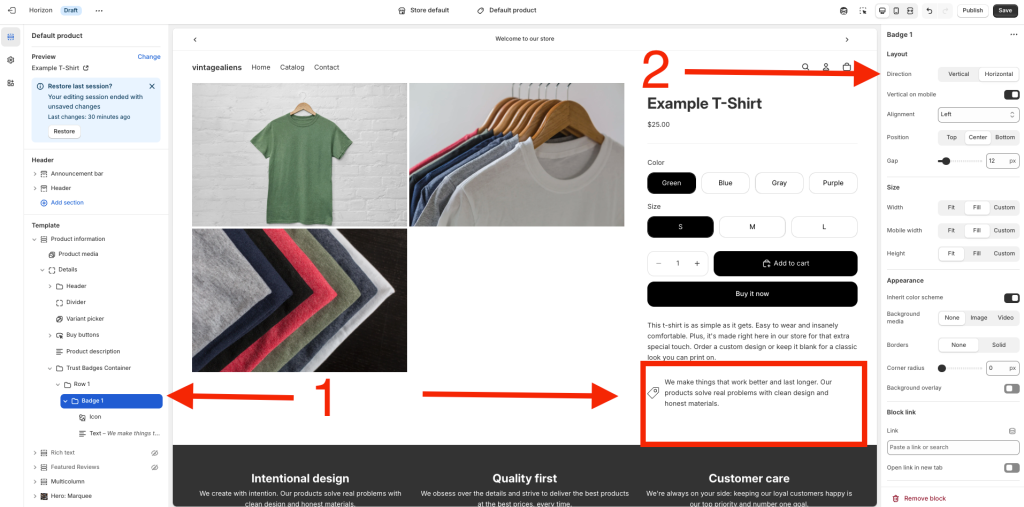
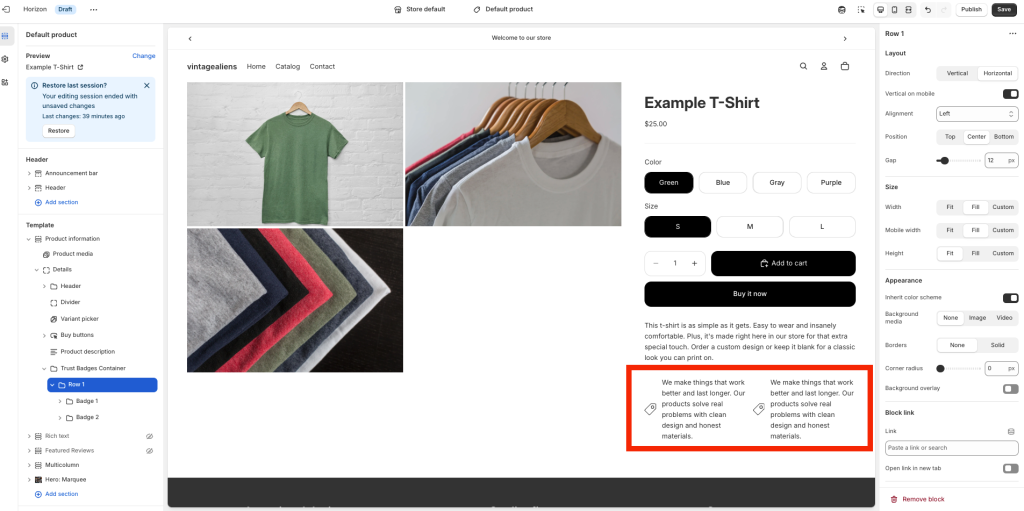
Also, when you have badge 1 and 2, you’ll notice that they’ll be stacked one above the other.
To fix this, just select the group called “row”, go to the options > layout > direction and select horizontal here, just like you did with the group called “badge”.
Up until this point, you should have something like this:
Duplicate Row 1 to Create Row 2
Once you’re happy with Row 1:
- Right-click Row 1
- Select Duplicate
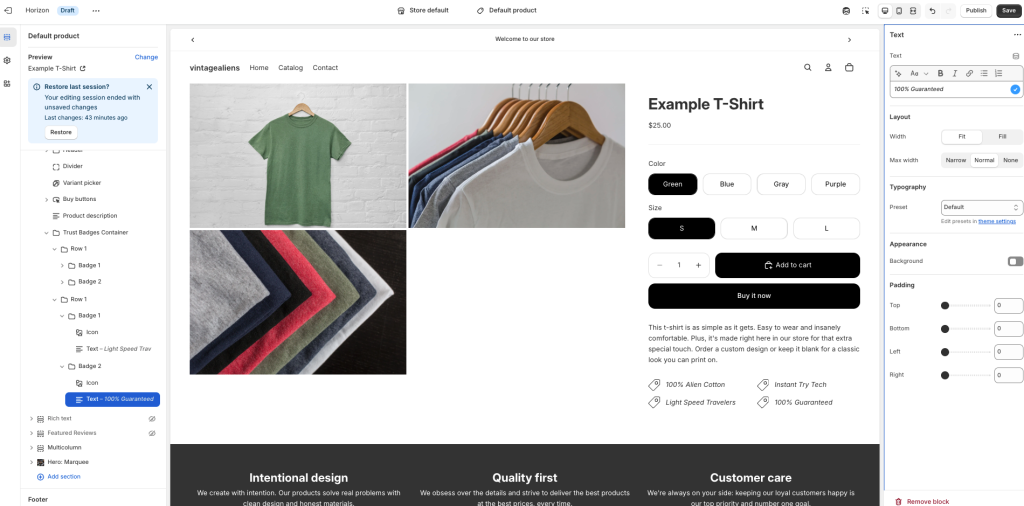
Rename them to Row 2, Badge 3, and Badge 4, then update each badge’s text.
Duplicating complete elements will just save you tons of time.
Shopify knew this, and that’s why they added copy/paste elements recently!
This is what I typed in my example:
- 100% Alien Cotton
- Instant Try Tech
- Light Speed Travelers
- 100% Guaranteed
Fix the Mobile Layout
Horizon gives you separate controls for mobile, and you must adjust them to avoid messy stacking.
Just go to the mobile view in your customizer and you’ll see that your badges look completely off, like this:
To fix this, just select each row
- Select the row container
- Turn Vertical Mobile OFF
- Center the alignment
Do the same for each badge inside the row.
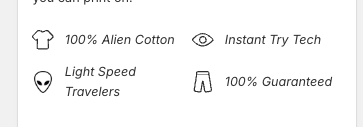
Now your badges will appear side-by-side on mobile, just like on desktop.
Customize Your Icons
All that is left now is selecting the icons you want, you can use Shopify’s built-in icons, but if you want something more unique, you might browse online and look for icons on places like FlatIcon.com
Just make sure that whatever icon you upload to your store uses PNG format or even SVG for the best performance.
All this gives your badges a much more custom and branded look.
Wrapping Up
And that’s it!
With just a few groups, some layout tweaks, and your preferred icons, you can build a clean, professional-looking trust badge section in the Horizon theme, no apps, no code, and no headaches.
This setup keeps your product pages consistent, fast, and visually clear, while giving your customers the extra confidence they need to hit that Buy button.
If you enjoyed this walkthrough and want to keep improving your Shopify store without getting stuck on the tech side, I’ve got plenty more tutorials just like this one.
Head over to my YouTube channel for the full video version of this guide (and many others), and don’t forget to subscribe so you don’t miss the next step-by-step tutorial.
Thanks for reading, and I’ll see you over there!